CS2 Patches Explained: The Agent Patch Cosmetic Nobody Reads the Manual For
If you have ever opened your CS2 inventory and seen a little embroidered logo sitting next to your stickers and wondered what it does, you have met a patch. Patches are one of the quieter cosmetic types in Counter-Strike 2, and unlike stickers they do not go on your gun. They go on your agent, the playable character model. Most people skip past them, which is a shame because they are cheap, low drama, and one of the few ways to personalize the human you are actually controlling.
Here is the short version of how the whole system works, then we will get into applying them and where they come from. If you want to browse the full catalog of designs and current pricing, the community-tracked list of CS2 patches is the easiest place to compare them side by side.
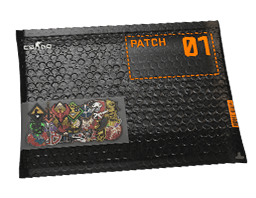
What a patch actually is and where they come from
A patch is a small graphic, usually a unit logo, a meme, or an event badge, that attaches to an agent model. You can equip up to five patches per agent at once, and they show up on the character in-game and in the inventory viewer. They do not affect gameplay at all. This is pure flair.
Patches almost always arrive in patch packs, which work like a sealed capsule. You buy or get the pack, open it, and you receive one random patch from that pack's set. A few of the sources you will run into:
- Patch packs on the Steam Community Market - sealed, opened for a random patch from the set.
- Operation rewards - older operations handed out patches as part of their drop tables.
- Themed sets - half-life, military unit, and meme-style collections that released over time.
- Trades - once unsealed, individual patches are tradeable and marketable like most CS2 items.
As of June 2026 patches sit firmly in the budget tier of the CS2 cosmetic world. Most common designs trade from a few cents to a couple of dollars, and even the sought-after ones rarely climb the way knives or rare stickers do. That makes them a friendly entry point if you are curious about the economy without risking much.
steamdb.comHow to apply a patch step by step
Applying a patch is much easier than applying a sticker, mostly because there is no scraping or positioning to fuss over. You need an agent first, since patches have nowhere to live without one. Here is the flow:
| Step | What you do |
|---|---|
| 1 | Own at least one agent skin (the playable character model). |
| 2 | Open Inventory, then click the agent you want to customize. |
| 3 | Select an empty patch slot on the agent (up to five total). |
| 4 | Pick the patch from your inventory and confirm. |
| 5 | Equip the agent and check the model in the loadout preview. |
A couple of things worth knowing. Removing a patch deletes it, the same way scraping a sticker does, so it does not return to your inventory once pulled off. You can rearrange which patches sit in which slots freely while they are equipped. And the patch only shows on that specific agent, so if you swap agents mid-match-loadout you will see different patches depending on the model.
Notable patches worth a look
Tastes vary, but a few categories consistently get attention. The Half-Life crossover patches are popular with longtime Valve fans. Military and special-forces unit badges suit players who want a serious, tactical agent look. And the joke patches, the ones with goofy faces or one-liners, are the most fun on a stream because teammates actually notice them on the character model.
If you are building a themed agent, the trick is matching the patch palette to the agent's outfit rather than just grabbing the rarest design. Five mismatched bright logos look like noise. Two or three coordinated ones read as intentional. Since the prices are low, experimenting costs you very little, which is exactly why patches are a nice low-stakes corner of CS2 to play around in.